• Email
  • Facebook
  • Instagram
  • Pinterest
  • Twitter
  • YouTube

Eileen Hull

Three dimensional art... with heart

  • Home
  • About
  • Products
    • Sizzix
  • The Paper Trail
  • Facebook Live
  • Project Videos
  • Blog
  • Videos and Press

Amy Powers’ Sizzix Journal Stitch Book

9 Jul

Today I’d like to share a beautiful surprise- Amy Powers’ Sizzix Journal Stitch Book! This girl is so talented! And I am so lucky she lives right down the road from me. We get together at our friend Pam Keravouri‘s beautiful studio (recently featured in Where Women Create!) once a month or so with other crafty friends and create.

Amy took the Journal die in a different direction and created a Stitch Book…

A Stitch Book is just like a sketch book only instead of pen and paper you use needle and thread to fill the pages! This book is a perfect place to sample new embroidery stitches, explore a design, or simply doodle with thread! A perfect take along, this project tucks nicely in your overnight bag. Just grab a needle and thread and let’s get stitching! 

Materials:

1 Large Felt Piece, 9.5″ x 15″

6 to 9 Assorted Felt Pieces, cut to 8″ x 8″

Assorted Embroidery Floss

Round Elastic for binding

Optional: Frixion by Pilot Pen

Tools: (list 1 per line)

Iron

Scissors

Needle

Instructions: 

  • Embroider a design for the cover. You can sew this design directly onto the felt piece for the cover or you can opt to sew it on another fabric which you then sew to the cover. The cover design should be 4″ x 9″ and will go on the right half of the fabric, ending 2.5″ from the right.
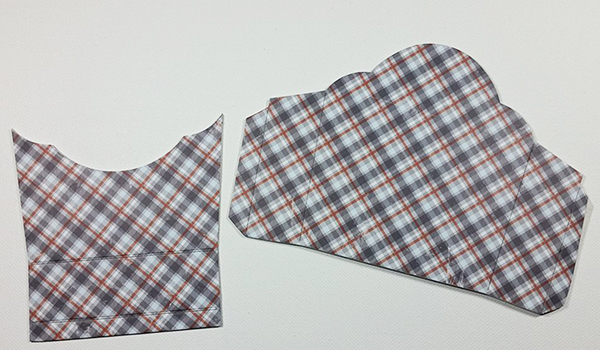
  • To create the cover, similar to a checkbook cover, fold over 2.5″ on each end of the 15″ long felt piece. Iron to crease the edge. Sew into place. I used a blanket stitch all the way around the book.
  • Thread the rounded elastic through parallel center holes of the mattboard cover to create 3 elastic bands. Knot to secure.
  • Insert the assembled book cover (mattboard) into the felt cover. You may need to bend the book spine backward to fit into sleeve.
  • To create the inserts for the book, fold each of the 8″ x 8″ felt pieces in half, using an iron to crease. Sandwich 3 of felt pieces. Sew along the inside seam of the inner most felt piece to bind these pages. Continue with the other groups of 3 felt pieces to create as many inserts as you’d like. The book will easily accomodate 3 inserts. You can make extras to have on hand to switch out as you fill the book with stitches!
  • To insert the pages, open to the center fold of each mini felt book and thread through the elastic band.
  • To embroider on the pages, you can keep the pages inserted in the book, or remove them, whichever is more comfortable for you. Keep a variety of needles and embroidery floss with the book so that you are ready to stitch whenever the urge hits. If you pre-thread your needles with assortment of flosses, it’ll be even easier to pick up and stitch in your new Stitch Book.
  • Tip: Draw the design you want to stitch onto the felt using a Frixion pen by Pilot. The ink in these pens disappears with heat which is handy for stitching since you can run a hot iron over the design you’ve stitched and poof! the design you drew for reference is gone!

About Amy

Like most middle children, Amy Powers learned early how to entertain herself marvelously. An active imagination decorated her world and occupied her mind. She grew up making art and telling wild stories. She still remembers precisely what it was like to be that little girl. More than a few decades later, Amy‘s still making stuff. Amy lives in the Washington, DC suburbs with her husband Rich and their adorable son Alfredo.

Categories:
Eileen Hull, Projects, Scoreboards, Sizzix, Uncategorized
Tags:
Amy Powers, Guest Designer, Heartfelt Sizzix Collection

DIY Children’s Headboard by Christie Troxell

30 Dec

A new year is starting soon- always a good time to re-organize and re-decorate. See how to create a DIY Children’s Headboard by Christie Troxell!

We are so happy to have Christie here this month- remember that amazing gramophone decor piece she shared last week? Visit her site, Ritzy Parties, to see more- this girl does it ALL- parties, florals, decor, lettering, you name it!

Now let’s see how she made this adorable DIY Children’s Headboard for her daughter’s room…

1childrens-art-diy-headboard-zebra-mounted-head-die-cut-flowers-2

This mounted toy zebra head in an ornate frame is an incredibly unique and whimsical decoration for a girl’s bedroom, or any space where you’d like to add a healthy dose of fun! Made with a thrifted frame, a fun, stuffed toy zebra head, and dies from Eileen Hull for the Sizzix Big Shot, this project comes together quickly, and can be easily adapted to any color scheme.

supplies-for-childs-room-decor

What You’ll Need:

  • Thrifted Frame
  • Paintable canvas to fit frame
  • Craft Paint
  • Stuffed Toy Zebra Head (or other animal of your choosing)
  • Fabric
  • Cardstock
  • Acrylic Gems
  • Sizzix Big Shot Die Cutting Machine
  • Eileen Hull “Heart and Soul” Flower Die, 661108
  • Beacon Adhesives Mixed Media Glue
  • Beacon Adhesives Power Tac

Instructions:

Step 1:

After ensuring my canvas would fit well into the frame, (found at a thrift store), I painted the entire surface with a bright peachy pink acrylic paint from the DecoArt Neon Lights Collection. I created this color by mixing equal parts of Peach Punch and Pink Explosion, and applied it with a paintbrush. 

paint-canvas-with-decoart-neon-lights-paint

Step 2:

I found this adorable bedding for girl’s bedrooms at Cotton On Kids. Luckily, the set came with a cute coordinating carrying bag. I found some perfectly coordinated cardstock paper, and got to cutting on my Sizzix Big Shot. I made a variety of patterned and solid cuts using Eileen Hull’s Heart and Soul Flower Die.

die-cutting-eileen-hull-with-cotton-on-bedding-kids

Step 3:

Before gluing my layered flowers, I laid them out on the canvas to create a basic layout. Mixing solids and patterns was a lot of fun! Once I had a firm idea of where the flowers would go, and what combinations would look great together, I used Beacon Adhesives 3-in-1 Glue to adhere them to the canvas, and then glued each layer atop the last to get this fun, 3-D effect. I was really excited to be able to create something that would match my daughter’s bedding exactly! 

laying-out-flower-die-cuts-on-canvas-for-girls-room-decor-idea

Step 4:

I attached the toy zebra head, (found at Target), to the center of the canvas using Beacon Adhesives Power Tac. This is a glue with extreme holding power, and I knew it would do the job. I let this dry overnight to ensure the strongest hold possible. 

zebra-flowers-papercraft-eileen-hull-dies-sizzix-17

Step 5:

Gems and gold tone buttons from my collection were added to the centers of the flowers for some sparkle! What’s a little girl’s room without sparkle? 

zebra-flowers-papercraft-eileen-hull-dies-sizzix-18

Step 6:

Finally, I placed the finished canvas into the frame, and it was ready to hang. Crossing my fingers that my little one likes this decoration for her fancy bedroom! 

zebra-flowers-papercraft-eileen-hull-dies-sizzix-20

Success! This is one girl’s bedroom décor idea that’s black and white, and adorable all over! My daughter loves her new art piece, and I’m so happy that I was able to get such a cohesive, coordinated look by using a little ingenuity, and my Sizzix Big Shot Machine!

childrens-art-diy-headboard-zebra-mounted-head-die-cut-flowers-4

Many thanks to Christie for this awesome tutorial!

Categories:
Art with a Heart, Projects, Sizzix, Uncategorized
Tags:
Christie Troxell, Die cut Flowers, Guest Designer, Sizzix

Candy Cane Caddy by Mitsyana Wright

22 Dec

Merry Christmas friends. Here’s a fabulous project for you- the Candy Cane Caddy by Mitsyana Wright! She shows how the Sizzix Caddy die can be used in two fun ways.

Mitsyana and I met a couple of months ago as we were working on our collaboration with DCWV. Her work is fantastic and she rocks those ScoreBoards dies! She graciously agreed to create a holiday project for us so check out the awesome tutorial below…

Candy Cane Caddy

Happy Holidays Crafty Friends! I am super excited to be guest designing for Eileen Hull Designs today!!

I love the versatility of her dies and how many of her designs are multifunctional. Here, I’ve made a candy cane caddy that also doubles as a Christmas ornament!

candy-cane-caddy2

For today’s project, I used Eileen Hull’s Caddy Die by Sizzix.

657123_3

This is a steel rule XL Scoreboard die. You will need to use the Sizzix Big Shot Extended Cutting Pads in order to use these dies.

candy-cane-caddy3

I started my project by first cutting down my 12” x 12” materials (chipboard and patterned paper), down to a workable 6” x 12” size so I can die cut them.

I didn’t want the entire caddy to be just one patterned paper. So, I trimmed down my 6” X 12” sheet into smaller pieces (4”x 6” and 6”x 8”) to cover just one of the panel pieces each.

Then, layered my chipboard piece over the patterned papers and ran all the material through my die-cut machine at the same time.

It cut through all the layers with ease!!

candy-cane-caddy4

I trimmed off the “tucking” flap pieces of the bottom box portion (for the patterned paper only)… you will not see these pieces so there’s no need to add them.

Then, I cut apart this cut out on the crease lines.

Next, I ran my papers through my adhesive machine and attached them to their coordinating chipboard pieces.

I also cut an extra back piece out of the same black patterned paper to cover the back of the caddy, ran it through my adhesive machine, and attached it to the backside of the caddy’s back wall.

candy-cane-caddy5

I added clear adhesive to the bare flaps and adhered them to the back panel.

candy-cane-caddy6

Then, I used more clear adhesive to attach a few embellishments and to trim with ribbons.

candy-cane-caddy

You can fill with your favorite holiday treats…

candy-cane-caddy1

Ready to gift as treats…

OR

candy-cane-caddy2

Because it has the wonderful handle built in…

Hang it on the tree as festive decor!!

I hope you enjoyed my project for today!! I am very honored to be able to guest design for the Eileen Hull Design Team.

HAPPY HOLIDAYS, EVERYONE!!

~ Mitsyana Wright (Up On Tippy Toes)


Thanks for sharing your ornament/treat box with us Mitsyana!

And thanks to all of you for stopping by to visit at this busy time of year. Happy Holidays from me, my awesome IT Coordinator Amy Bowerman, and the Inspiration Team! We are looking forward to sharing another year of awesome creativity with you.

Categories:
Holiday Crafts, Scoreboards, Sizzix, Uncategorized
Tags:
Art with Heart, Candy Cane Caddy, Guest Designer, Mitsyana Wright, Sizzix

Festive Sizzix Lantern Tutorial by Astrid Maclean

14 Dec

Hello everyone!  The Inspiration Team is taking a much needed break over the Holidays so we are bringing in guest designers from around the globe to Inspire you throughout December.  Today I’d like to welcome Astrid Maclean!  Astrid is a talented designer from the UK and I’m sure many of you are familiar with her work.  You can learn more about Astrid and her inspired designs on her blog Astrid’s Artistic Efforts.  Keeping with the Holiday theme Astrid has created a Festive Sizzix Lantern tutorial for you today.  Let’s get inspired with this creative tutorial by Astrid Maclean..

Festive Sizzix Lantern

A Festive Sizzix  lantern using Eileen Hull 3D block cube 658983

Festive Sizzix Lantern by Astrid Mclean

STEP 1:

I created a festive lantern, using the large 3D block cube. This wonderful die had a magnetic central opening in one of the squares, perfect for cutting windows in the sides. You need to cut the main die twice to create your cube.

STEP 2:

I covered two Sizzix little sizzles mat board strips with scrapbook paper, cut them out with a Sizzix movers and shapers circle die in the magnetic opening. The medium sized circle fits the opening to perfection.

I cut off one of the squares, so the bottom part of the finished cube would be open, and kept the cut out circle for later.

Festive Sizzix Lantern by Astrid Mclean

STEP 3:

I created a base for my lantern from mat board, covered it with crackle paint and when dry painted it blue to match the colour used on my lantern.

Festive Sizzix Lantern by Astrid Mclean

STEP 4:

I cut a couple of cherubs from the mat board once more, using another movers and shapers die. One was covered in paper, the other painted once more to match. I used the cut out circle to create a little stand so my cherub could stand on top of my lantern.

Festive Sizzix Lantern by Astrid McleanSTEP 5:

I gathered some embellishments, using the Tim Holtz Holiday Greens mini and Vintage Tidings Thinlits dies and some flowers and berries from my stash, and then put everything together using my hot glue gun.

Festive Sizzix Lantern by Astrid Mclean

Festive Sizzix Lantern by Astrid Mclean

STEP 6: 

A little battery operated tea light finished it all off.

Festive Sizzix Lantern by Astrid Mclean 8Hats off to Astrid Maclean for this fabulous Festive Sizzix Lantern Tutorial!  Please visit Astrid’s blog for more creative projects and let her know how much you love her Festive Sizzix Lantern.

Stay tuned for more Holiday creativity from special guest designers this month.

Eileen

Categories:
Eileen Hull, Holiday Crafts, Sizzix
Tags:
3D Block Cube die, Astrid Maclean, Guest Designer, Holiday Lantern, Holiday Sizzix projects

Sizzix Holiday Gift Wrap

7 Dec

While our Inspiration Team Elves are busy making samples for CHA, we are super excited to welcome our talented Guest Designer friends to share their favorite holiday projects with us this month. The first one up is Sizzix Holiday Gift Wrap by my good friend Susie Bentz. Don’t you love how quick and easy this is? And you can make it with only one piece of matboard!

Guest Designer Susie Bentz

Hello!  I was just delighted when Eileen invited me to create a special holiday project to share on her blog this month. It is probably no surprise that my mind immediately went to gift giving.  I find during the holidays that I often want to give a small gift and the biggest dilemma is how to wrap it.  The easiest solution is to use Eileen’s Flower Pocket die!

1a-eillen-hull-sizzix-flower-pocket-die-christmas-gifts-by-susie-bentz-with-authentique-wintery

How to:

I started by covering both sides of a piece of Little Sizzles white mat board with paper from the Authentique Wintery Collection.  I used Therm O Web Easy-Cut adhesive sheets to adhere the paper.  This is an XL Die so you will need to use extended cutting pads.  I wanted the plaid pattern on the outside of the finished box so I placed it face down on the die and ran it through the machine.

2-eileen-hull-pocket-die-authentique-wintery

The pocket is formed from just 2 pieces: the bottom/front piece and the back/sides piece.  Here is a look at the reverse side of the die cuts which was covered in gray paper with a tiny snowflake pattern.

2a-eileen-hull-flower-pocket-die-authentique-wintery

After I bent the die cut at all the scored lines, I applied Therm O Web SuperTape on the tabs.

2b-eileen-hull-flower-pocket-therm-o-web-supertape

I attached the bottom/front piece by centering the tab on the inside bottom of the flower pocket. Here is a view of the backside of the pocket at this point.

2c-eileen-hull-flower-pocket-die-sizzix-authentique-wintery

Next I folded up the front and adhered the side tabs to finish forming the pocket.

2d-eileen-hull-sizzix-flower-pocket-die-authentique-wintery

This sweet little pocket is now holding a pair of gloves and is ready for gifting!

3-authentique-wintery-gift-wrapping-eileen-hull-flower-pocket-die

It was so fast and easy that I created a second pocket and filled it with candies and a gift card!

4-authentique-wintery-eileen-hull-flower-pocket-die-gift-card-holder

By the way, the Flower Pocket fit perfectly inside a clear treat bag I picked up at a local store.

4a-eileen-hull-sizzix-flower-pocket-die-gift-card-holder

Gift giving couldn’t be easier when you have Eileen’s die to help with the wrapping!

7-eileen-hull-sizzix-flower-pocket-die-christmas-gifts-by-susie-bentz-with-authentique-wintery

Supplies:

Sizzix Scoreboards XL Die – Flower Pocket

Sizzix Little Sizzles – 6″ x 13″ Mat Board Pack, 6 White Sheets

Therm O Web iCraft Easy-Cut Adhesive Sheets

Authentique Paper – Wintery Collection

******************************************************************

If you would like to see more of my projects you can check out my blog, My Time to Play, or join me on any of my other social media sites:

  • Facebook
  • Instagram
  • Pinterest
  • Twitter

Thanks for stopping by and I hope you find some time to play today!  Susie

Categories:
Eileen Hull, Holiday Crafts, Projects, Scoreboards, Sizzix, Uncategorized
Tags:
Gift Wrap, Guest Designer, holiday, Susie Bentz

Gel Print Photo Mat by Cheryl Boglioli

29 Jun

We are squeezing in two more Crescent projects this month. I am happy to share this Gel Print Photo Mat by Cheryl Boglioli, our Guest Designer this week! Cheryl and I have had the chance to travel together all the way up to Canada where we taught at the Quartermain House Creative Retreat this spring. We attracted some looks as we caravanned up Route 95 with Scotty and Glinda! Cheryl is an interesting combination of artist and crafter and I love how she combines the two into her own unique style. Let’s see what Cheryl has created for us today…

Cheryl is a mixed-media artist on the leading edge of new products and techniques within the various disciplines of the ever-growing market. She is the Design Team and Education Coordinator for The Crafter’s Workshop and works with many other manufacturers in the Craft & Hobby Industry as a Designer and/or Educator.  As a full-time Artist with an intuitive painting style and a passion for teaching, you can find her Living the Art Life ™, traveling and teaching workshops at independent stores and events nationwide with her renovated 1970 vintage trailer, Glinda. If you see her along the way, she even gives tours and appearances with Glinda. See more of Cheryl and her adventures at www.cherylboglioli.com.

Gel Print on Photo Mat Art Board

I love layers and layers of paint, so when Eileen asked me to be a guest designer using Crescent Photo Mat Art Board, I was excited to show off how well this takes a lot of paint.

Cheryl-Boglioli-GelPress-frame-2

I used my Gel Press plates to create multiple layers.  This 8×10 Photo Mat Art Board was the perfect fit for my 8×10 Gel Press plate.   I created a few background layers using the 8×10 plate with paint and some stencils by The Crafter’s Workshop. 

Cheryl-gel-press

To add more layers, I then used a small circle petites gel plate, 4×4 stencils and more paint and finished it off with another print on the 8×10 to bring it all together and push back some of the layers to the background.

The Crescent RENDR paper was great to use and pull the extra second and third prints while monoprinting on the Photo Mat Art Board.  I selected one of these extra prints to stamp a sentiment and used this in the frame. 

A few more stamped images and I have a great piece of art that fits beautifully in an 8×10 frame! 

Cheryl-Boglioli-GelPress-frame-1 

If you want to learn more about monoprinting with Gel Press plates, look for me teaching at a store or event near you. 


Thanks so much for sharing your project with us Cheryl!

Categories:
3D Art, Art with a Heart, Guest Tutorials, Uncategorized
Tags:
Cheryl Boglioli, Guest Designer, mixed-media, monoprinting, stencils

  • 1
  • 2
  • 3
  • Next Page »

Meet Eileen

I grew up in a big family where there was always an art project in the works. Learning to think creatively has been a huge benefit throughout my life: from thirteen military moves and raising four children to developing product lines for craft manufacturers. Come visit and see a slice of my life...
Read More…

Eileen Hull Creative Team 2025

Sign up for my weekly newsletter!

Join the Eileen Hull Fan Club

Join the Eileen Hull Fan Club

Archives

Categories

-http://bellacraftspublishing.com/gifts-to-die-for-with-eileen-hull

Featured in

Where Women Create BUSINESS Spring 2015

Dollar Tree

Copyright © 2025 · Bloom theme by Restored 316

Copyright © 2025 · Bloom Theme on Genesis Framework · WordPress · Log in